 |
| (Above) Revell's 2010 Camaro kit is another example of why Revell still is known for producing excellent model car kits! This kit features beautiful details that replicates the beautiful Camaro perfectly. I wanted to build the kit box stock so that our readers could see exactly what they're getting in the kit, but I wanted to paint it in a way that would make it stand out from the rest of the Camaros out there. |
 |
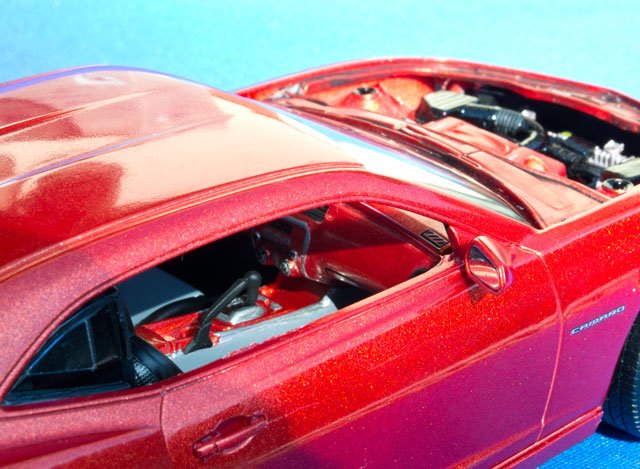
| (Above & Below) The kit's motor features crisp details that can be brought out with just a little paint detail work. The majority of the motor was painted in Alclad aluminum. The top of the motor features valve covers and a intake manifold painted in semi-gloss black. The coils are painted gloss red with yellow plug wires. The engine cover was painted in the cars body color. |
 |
 |
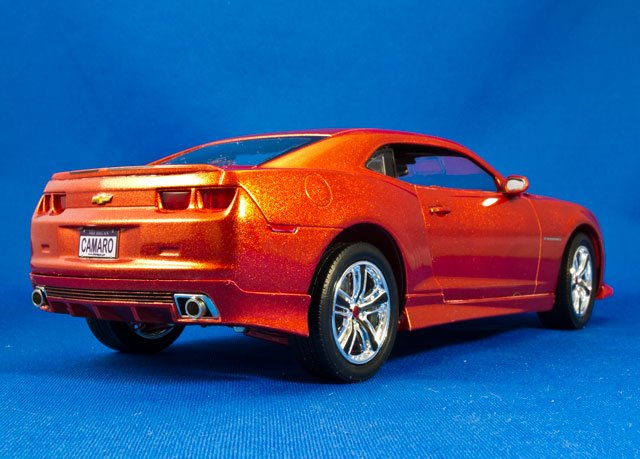
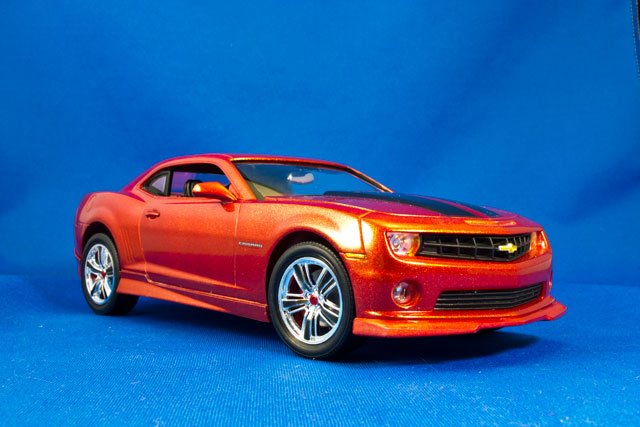
| (Above) Dupli-Color's Metal Specs orange over their flat white primer was used to paint the car. To give the car more of a "custom" look I painted a section of the door panels, center console, and the dash body color. After the Metal Specs was dry I baried it in their clear coat. It was block sanded with fine paper and then rubbed out with Novus three step polishing compond (available at TAP Plastics). |
 |
| (Above) The plastic tanks on the passenger fenderwells were masked off before painting the body color. Then Tamiya's transparent colors were used to simulate the different fliuds. Semi-gloss black was used to paint the caps. |
 |
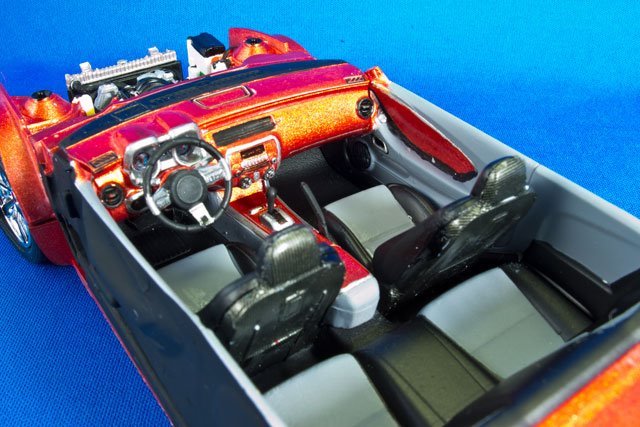 |
| (Above) The interior was painted in gray primer and flat blacks. The outside of the interior tub doesn't have to be painted, its just a weird habit of mine. |
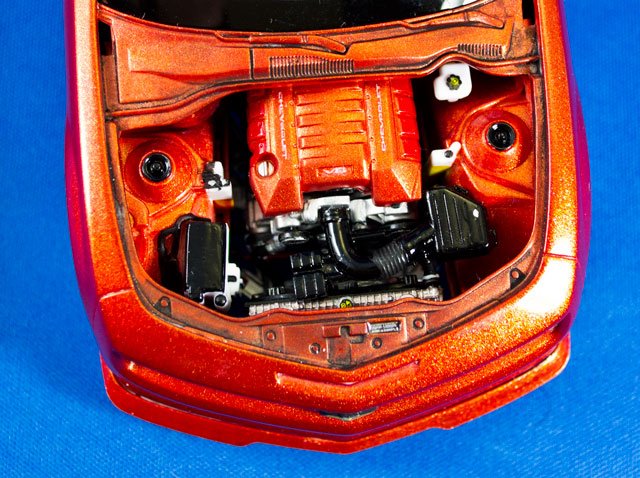 |
| (Above) It's almost a shame to cover up the motor detail with the engine cover. So I didn't glue mine down. I usually display it with the hood and engine cover sitting in front of the car. |
 |
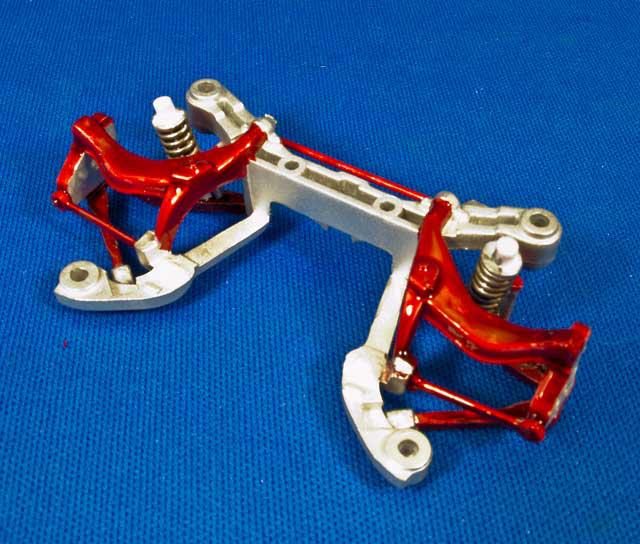
| (Above & Below ) The two suspension cradles are aluminum so I painted them in Alclad aluminum and the A arms were covered in transparent red (to make them look like they're anodized). Sway bars were painted in the transparent red as well. The struts were done in transparent blue. |
 |
 |
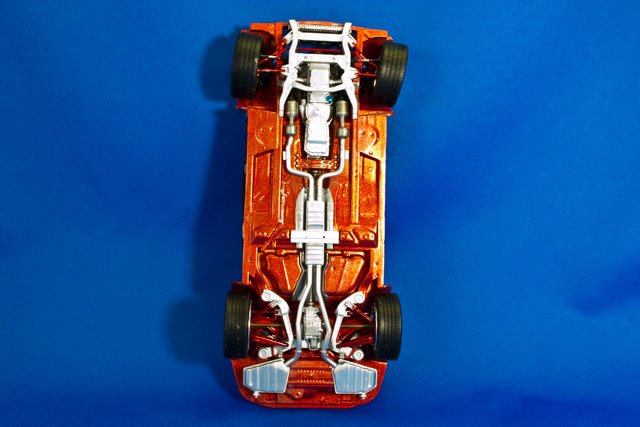 |
| (Above & Below) The completed chassis is nicely detailed right out of the box. But with a little paint and time you can really bring it to life. By painting the chassis body color and using the red and blue transparent colors, the chassis now looks like a custom pro touring car rather then a stock chassis. |
 |
 |
| (Above) A closer look at the interior, I like bringing the exterior color inside. |
 |
| (Above) The custom wheels were a little too "chromey" for me. To tone them down a little I used Tamiya's "Smoke" paint to tint the center spokes of the wheel. The transparent red is used on the center cap. |
 |
 |
 |
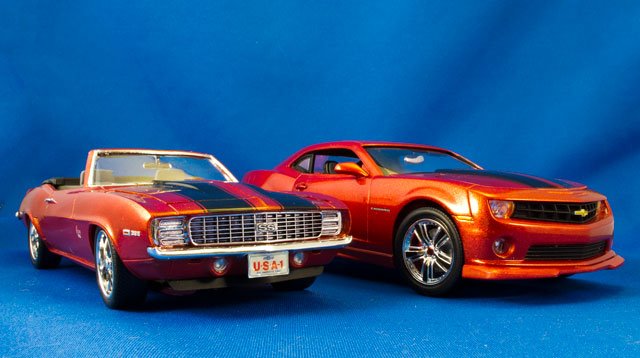
| Final Thoughts; this is nice kit that goes together and features some beautifully molded in details. The motor alone is a nice display piece, almost hated putting it down in the chassis, should be on an engine stand. I built this model as a companion piece for the box stock '69 Camaro I built in Model Car Builder no.7 (page 12). They look great together. |
 |